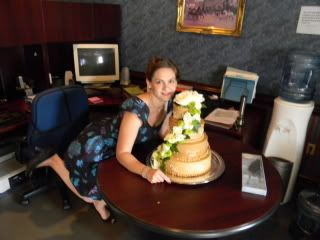
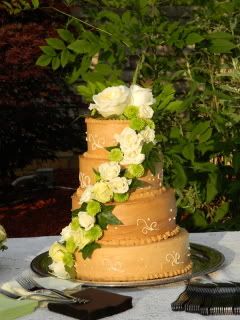
My main weekend activity consisted of baking and constructing this cake for my friend's wedding:
Sorry, I didn't take photos of the entire process; but I assure you: I did make it. With great help from my sister, Naomi.All of the icing is coffee flavored. The bottom tier is chocolate, with Kahlua for flavoring. The next tier is white cake with raspberry jam filling. After that, yellow layers with butterscotch filling; and the top is a repeat of the bottom. The flavors were all my friend Crystal's invention; and everyone said the cake tasted wonderful! I have no idea how it tasted; I was in no mood to eat any of it after 2 days of baking and assembling it. I had done some taste-test trial runs with the recipes before, and they were great; so I think it was okay.
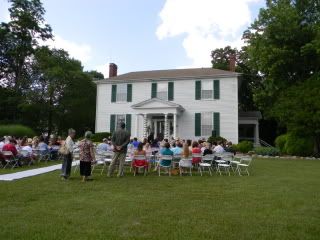
Anyway... the wedding was held at a historic Antebellum home in my hometown, and the reception was held at the home of the parents of the bride.
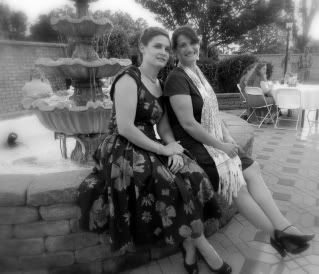
I wore the dress from this post; which was expertly altered by my Mom. My look was entirely 1950s; except for I had no hat to match the dress. :(
My weekend also included my nephew's 2nd birthday party, and attending the Memorial Day Ceremony at the Historic Caswell County, NC Courthouse on Monday; following some morning thrifting and yard sale-ing. We also went and saw the movie Thor; which, in my opinion, rocked.
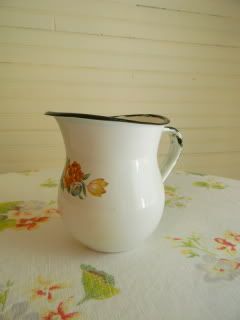
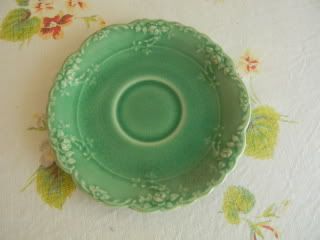
Here's my 2 favorite things from my weekend yard sale-ing:
(Small enamelware pitcher with floral design on the front)
(Awesome apple green saucer with raised floral design.... I would trade almost my other dishes for an entire set of these!)
Tuesday, May 31, 2011
Monday, May 30, 2011
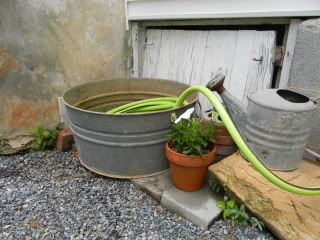
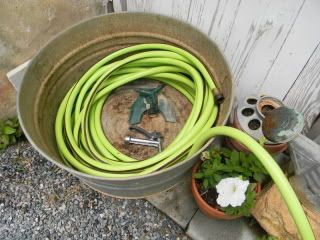
A Great Garden Idea
Sunday, May 29, 2011
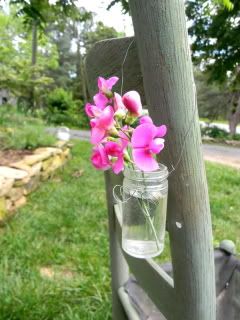
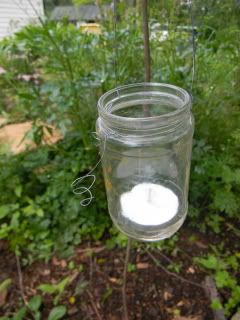
More Flowers And Old Jars
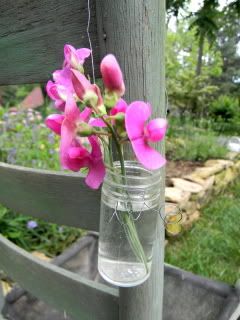
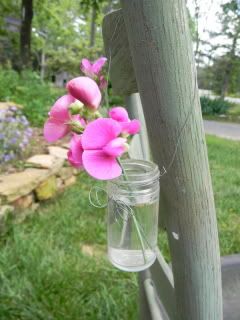
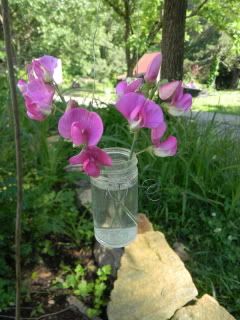
I got really into my old jars last week; and playing around with different ways to use them for floral display. What I love about the old jars, I think, is the basic simplicity of the look; with a simple stem or two of a flower. It's so simple and yet so elegant.... and sweet. I never look at a jar as just another thing to toss anymore.
You don't have to have a huge bunch of a bunch of different kinds of flowers to make a statement. Sometimes, a small flower in a simple vessel makes a big impact, too.
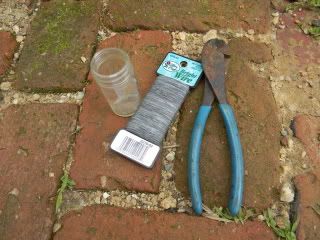
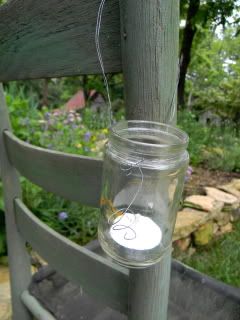
I didn't think up this project on my own; I have seen old bottles and jars fitted with wire for hanging before in magazines like Southern Living, Country Living, Victoria, Country Home, etc. as well as a very nifty, very inspiring old bottle and wire mobile on the Magnolia Pearl website (photo number 5 in this collage from her wedding, featured in Romantic Homes).
Ideally, I'd like the wire to be rusty and old looking. All I have to do is leave these out in the rain once or twice for that.
Labels:
Antiques and Collectibles,
Gardening,
Photography
Friday, May 27, 2011
Office Before and After Pics
Two posts in one day..... because I am so excited about finally getting to actually see progress and see results from all my recent, very hard, patient, and painstaking work in my "office" room. I am only showing one corner of the room, however - as the other side is not "put together" yet, as I am waiting (always waiting around for something or another) on some slipcovers, curtains, etc. for my official "after" photos there.
Okay, here is before:
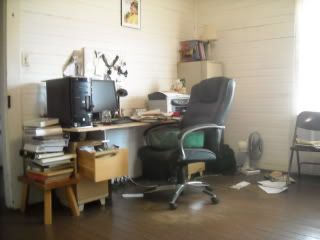
Oh dear. We improvised a desk from 1960s bedside tables and a board. What a fright. I was picky about what I wanted for a desk and didn't want to buy a cheap Wally World computer cabinet desk. I suffered with this .... thing ..... for over a year. But, I started my business here - so, not all bad. :)
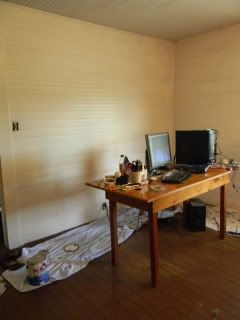
When the weather started to stay consistently warm this spring, I dove into painting. Now, this is not your "get it done in a jiffy" roll job paining. The rooms in my house are 1920s pine beaded board, and every inch has to be brushed on. With primer. And then two coats of wall paint have to be brushed on. This, after all the loose paint has been scraped and sanded off. This one room took me a week of scraping, sanding, priming and painting almost every single day; all day - and sometimes at night.
Oh, and the old "desk" got tossed when I found, and bought, an old handmade pine farm table on Craigslist for $25.
After:
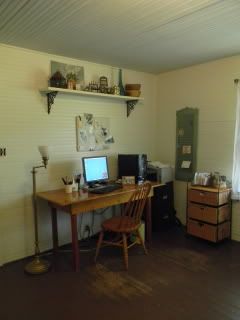
The one thing I still don't like is my old brown metal filing cabinet that my printer sits on. I am going to look for an oak one, and maybe one a bit taller also.
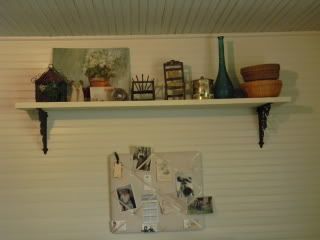
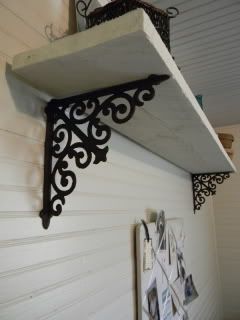
I like to use the odds and ends that I collect in my decor, and I think one good way to do that is on wall shelves. I bought some wrought iron, "scrolly", rustic looking shelf brackets at Hobby Lobby when they were 50% off. Both cost me less than $10. While I really like the "shabby cottage" look, I like to mix it with rustic elements and go easy on the frilly, Victorian girly aspect of "shabby cottage". So, Kevin cut me a length of rough-sawn oak board from the barn, and a painted it with some leftover flat off white paint; so it looks white washed and "old". I had hung two vintage prints on either side of the message board thing, and it looked crammed and cluttered on the wall so I took them down right away. No cluttered walls for me!
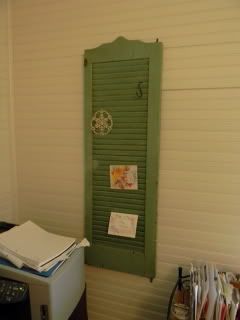
I found the window shutter in one of our barns, already painted a fantastic vintage green color. I scrubbed it, clear coated it, put some picture hanging brackets on the back, and hung it on the small corner wall. I can now stick all kinds of trinkets on it.
As you can probably gather from this one corner, my color theme in the office is blues and greens. The floor, as you can see, needs attention; but we're going to strip and sand all the floors in one weekend later in the summer after the painting is all done. To do the floors, all the furniture has to be moved out; so we're going to have to empty the front rooms of our house for two or three days to get it done right. Then, they'll be a lovely light pine, and we're going to shellac the hack out of them.
A few thoughts on walls:
After moving in here, I confess I was at a loss as to how to handle decorating the huge expanse of wall space I had in my downstairs rooms. The rooms are square, with double windows facing the street on only one side, with a fire place on the side at right angles to the window walls. The ceilings are high, so the walls are tall.
I like neutral colored walls and color in my furniture and textiles; so what I had is tall, bare expanses of bone-colored walls. And I despise clutter; I like a clean wall without busyness. I don't even like hanging framed photographs on my walls. I am weird and non-traditional like that. And I don't want to clutter them up with rows of framed prints, sconces, mirrors, and the like.
I have thought about it a lot and I decided the best way for me to deal with my large walls is by hanging "objects" on the walls. Like the window shutter. Also, shelves, for displaying my collections. So now when I yard sale, thrift, auction and antique shop, I look at objects for their "hanging on walls" possibilities. Also, I think another way I am going to solve my empty amounts of wall space is by buying some taller pieces of furniture.
So this is where I conduct my Etsy business every day. And blog, and keep up with friends on face book, and shop eBay and watch costume dramas on Netflix. I am excited about showing the rest of the room as soon as I can! Finally - some progress I can see and touch.
Okay, here is before:
Oh dear. We improvised a desk from 1960s bedside tables and a board. What a fright. I was picky about what I wanted for a desk and didn't want to buy a cheap Wally World computer cabinet desk. I suffered with this .... thing ..... for over a year. But, I started my business here - so, not all bad. :)
When the weather started to stay consistently warm this spring, I dove into painting. Now, this is not your "get it done in a jiffy" roll job paining. The rooms in my house are 1920s pine beaded board, and every inch has to be brushed on. With primer. And then two coats of wall paint have to be brushed on. This, after all the loose paint has been scraped and sanded off. This one room took me a week of scraping, sanding, priming and painting almost every single day; all day - and sometimes at night.
Oh, and the old "desk" got tossed when I found, and bought, an old handmade pine farm table on Craigslist for $25.
After:
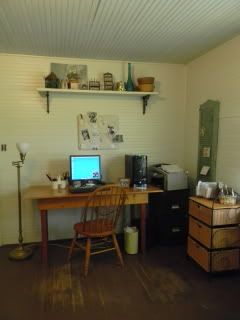
The one thing I still don't like is my old brown metal filing cabinet that my printer sits on. I am going to look for an oak one, and maybe one a bit taller also.
I like to use the odds and ends that I collect in my decor, and I think one good way to do that is on wall shelves. I bought some wrought iron, "scrolly", rustic looking shelf brackets at Hobby Lobby when they were 50% off. Both cost me less than $10. While I really like the "shabby cottage" look, I like to mix it with rustic elements and go easy on the frilly, Victorian girly aspect of "shabby cottage". So, Kevin cut me a length of rough-sawn oak board from the barn, and a painted it with some leftover flat off white paint; so it looks white washed and "old". I had hung two vintage prints on either side of the message board thing, and it looked crammed and cluttered on the wall so I took them down right away. No cluttered walls for me!
I found the window shutter in one of our barns, already painted a fantastic vintage green color. I scrubbed it, clear coated it, put some picture hanging brackets on the back, and hung it on the small corner wall. I can now stick all kinds of trinkets on it.
As you can probably gather from this one corner, my color theme in the office is blues and greens. The floor, as you can see, needs attention; but we're going to strip and sand all the floors in one weekend later in the summer after the painting is all done. To do the floors, all the furniture has to be moved out; so we're going to have to empty the front rooms of our house for two or three days to get it done right. Then, they'll be a lovely light pine, and we're going to shellac the hack out of them.
A few thoughts on walls:
After moving in here, I confess I was at a loss as to how to handle decorating the huge expanse of wall space I had in my downstairs rooms. The rooms are square, with double windows facing the street on only one side, with a fire place on the side at right angles to the window walls. The ceilings are high, so the walls are tall.
I like neutral colored walls and color in my furniture and textiles; so what I had is tall, bare expanses of bone-colored walls. And I despise clutter; I like a clean wall without busyness. I don't even like hanging framed photographs on my walls. I am weird and non-traditional like that. And I don't want to clutter them up with rows of framed prints, sconces, mirrors, and the like.
I have thought about it a lot and I decided the best way for me to deal with my large walls is by hanging "objects" on the walls. Like the window shutter. Also, shelves, for displaying my collections. So now when I yard sale, thrift, auction and antique shop, I look at objects for their "hanging on walls" possibilities. Also, I think another way I am going to solve my empty amounts of wall space is by buying some taller pieces of furniture.
So this is where I conduct my Etsy business every day. And blog, and keep up with friends on face book, and shop eBay and watch costume dramas on Netflix. I am excited about showing the rest of the room as soon as I can! Finally - some progress I can see and touch.
Vintage Chair Planter, Part 2.
Inspired by my other chair, I decided to make another vintage chair planter under a shade tree outside one of my kitchen windows.
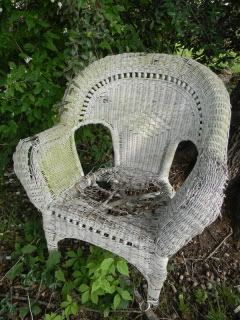
Okay, so I don't think this chair is vintage; but anyway..... I found it at the "green box" and fished it out. It's falling apart and very shabby.
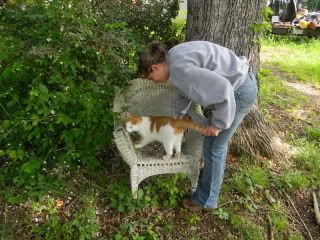
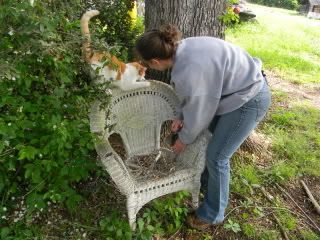
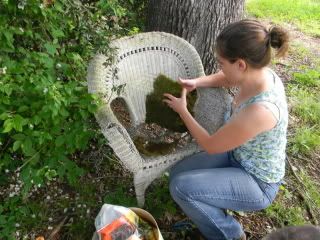
I ripped the seat out, first.
Phileppe, who must be in on all exciting yard projects, had to get involved. And please excuse the grubby, baggy husband sweatshirt. It was chilly in the shade that morning, and I stole it.
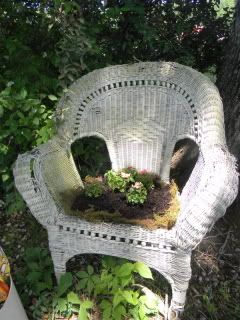
I cut a piece of chicken wire and formed it into the hole where the seat was. Then I lined it with the sheet moss.
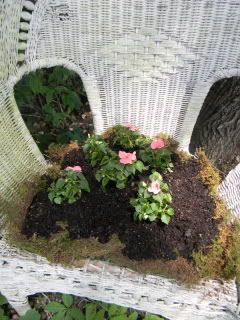
Added potting soil and impatiens...
It will probably not survive until next summer, but that's okay. For now, it's a quaint and quirky piece of beauty that I can enjoy while cooking. :)
The more I "design" my gardens, the more I love using salvage and whimsical, non-traditional, outside-the-box ideas.
Thursday, May 26, 2011
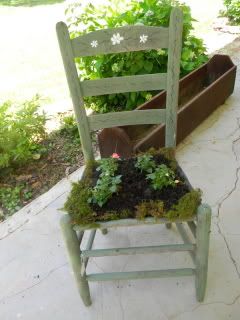
Vintage Chair Planter, Part 1.
One of the local antiques shops in my hometown used to have two chairs sitting by the font door, with flowers planted where the seats of the chairs used to be. I always thought they were so cute and quaint!
Well, last fall, the shop went out of business and the auctioned everything off. Even thought I attended the auction, and bought a LOT of stuff, I never saw the chairs.
This spring, however, the former owner of the shop (who lives in my parent's neighborhood), held an auction of even more things from her personal stashes, and the remainder of the contents of her two antique shops that she had stashed in her basement. I didn't get to go to the auction, but my friend - who owns an antique shop herself - went, and bought a bunch of things. Two of which were the vintage chair planters I admired so much!
I immediately purchased one of the chairs from her. And, I may purchase the other one as well - even though, I have nowhere to put it at the moment.
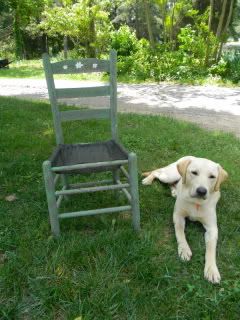
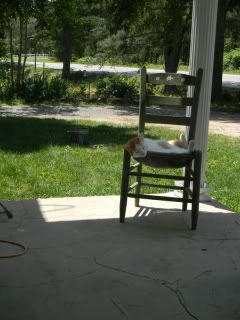
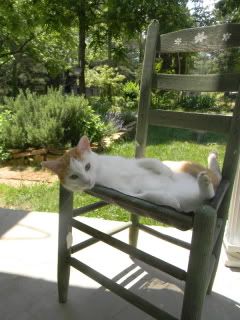
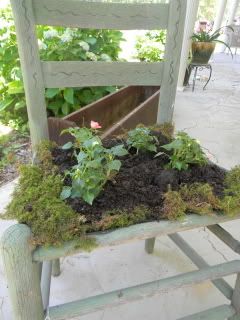
The chair is a lovely vintage green - one of my favorite colors. It has some white daisies painted on it. As you can see, it is fitted with a mesh, landscaping-fabric type of "basket" in t he area where the seat should be. The mesh is stapled on.
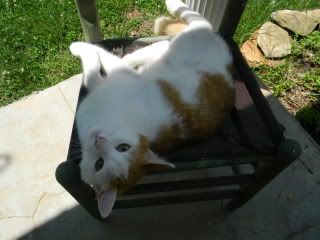
Phileppe thought is was supposed to be a kitty hammock.
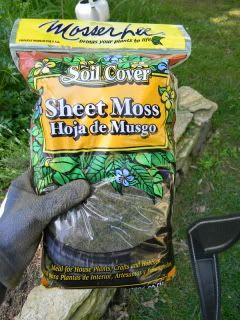
I went to Lowes and bought some packages of sheet moss, and pink impatiens. After I re-claimed the chair from Phileppe, I placed a layer of the moss inside the "basket", added potting soil and flowers, and that was that.
Once the flowers begin spreading and blooming it will look like a "pillowy" flower cushion.
Wednesday, May 25, 2011
Strawberry Time
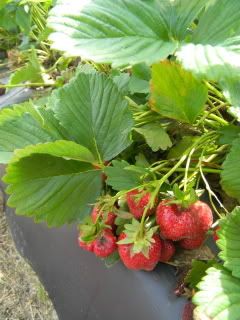
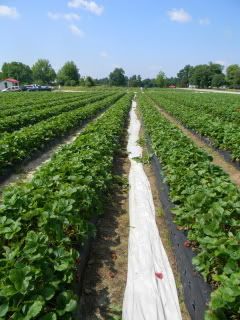
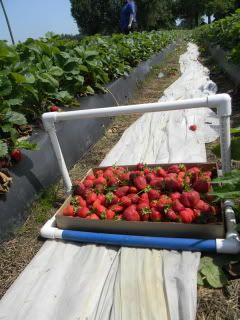
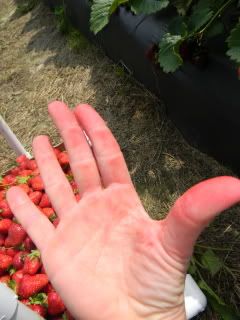
Oh yes - it's strawberry time in my neck of the woods. Last week, mom and I went to a you-pick place and loaded up on delicious juicy-ness.
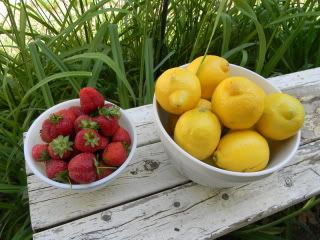
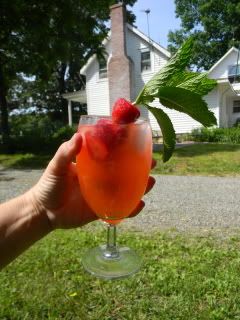
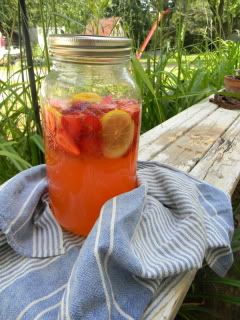
I made some strawberry lemonade - one of my all-time favorites.
How to make it:
1 C sugar
1 C water
1 C sliced strawberries
7 lemons
Bring sugar and water to a boil, remove from heat and cool. Slice berries. Juice 6 of the lemons. Place the berries and lemons in a tall pitcher, jar or other large glass container. Add sugar water mixture. Mix in 4 cups water. Slice 1 lemon thinly, and add to the lemonade. Serve in glasses of ice. Garnish idea: Skewer whole capped strawberries on mint stems with only the top leaves left on. (See pic.) Keep refrigerated. Mmmm!
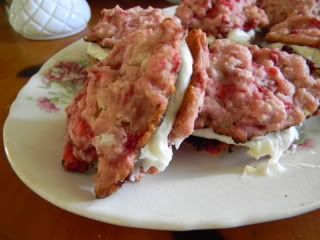
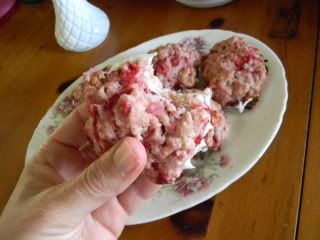
We also ate strawberry shortcake on more than one occasion, and I made strawberry shortcake sandwich cookies:
I got the cookie recipe from a Martha Stewart Magazine, and I just sandwich them with cream cheese frosting:
2 C diced strawberries
1 tsp. lemon juice
1 Tbsp. plus 1/2 cup sugar
2 C all purpose flour
1/2 tsp. salt
2 tsp. baking soda
6 Tbsp. cold butter, cut into small pieces
2/3 cup heavy cream
Preheat oven to 375. Combine berries, 1 Tbsp. sugar, and lemon juice in a bowl and set aside. Whisk together flour, salt, baking powder, and 1/2 cup sugar in a large bowl. Cut in butter with a pastry blender until mixture resembles coarse crumbs. Stir in cream until dough begins to come together, then add the strawberries. Drop onto parchment lined baking sheets and bake 15 - 20 min. until golden brown. Cool. Spread underside of one cookie with cream cheese frosting and top with another cookie.
What kinds of things do you make with strawberries?
Tuesday, May 24, 2011
1940s Thrift Re-Fashion Dress, and Other Treasure
While I was "off line" I also did my regular thrifting stops and a few yard sales last weekend as well. One of my thrift shop treasures was a dress I passed over on the rack, and then had a brainstorm and went back to get. It was a dated 1990's era dress, but it's details really caught my eye. The print is a tiny flower sprig on a navy background. The fabric feels rayon-like; although I doubt it is 100% rayon; it's probably a poly blend.
The dress was clean, and in nice shape; two main things to look for in items from the thrift. What caught my eye was the neckline, and ties on the sleeves, the tie on the front, the gathered fabric in the shoulders, and the classic 1940s era "lines". I bought the dress. Here it is, after I cut off 4 inches off the bottom (it was almost ankle length; and in the 1940s hems were shorter), removed the bottom button to the space on top where one was missing, and hemmed it another 1 - 2 inches.
Shoulder detail - one of my fave features:
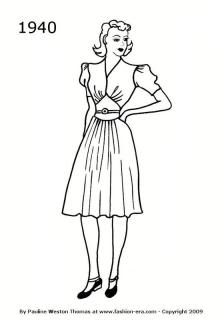
It looks similar to this pattern; except for without the narrow belt and with the addition of the ties:
(From the Fashion Era website)
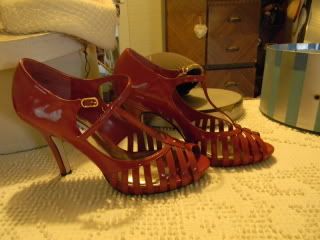
On a stop in another thrift shop, I picked up the shoes seen in the above photos: brand - new, still with the $70 price tag, Steve Madden, candy apple red, t-strap heels in my size. For only $7.00. When I saw those babies, I knew they were coming home to live in my closet, and I practically knocked over another woman to get to them. (Just kidding. There was another woman inching close to them, but I didn't knock her over. I may have elbowed in a little bit, but that's it.)
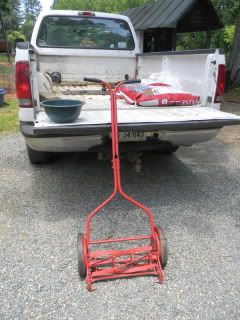
I picked up this nifty old lawn mower at a yard sale; only to get it home and have Kevin tell me it didn't work... something about bearings in the wheels. Oh well. It can be salvage decor in my gardens.
And among other misc. stuff not shown from the yard sale-ing, these nifty old sunnies. What a hoot.
Subscribe to:
Posts (Atom)