I had a small stash of plain ol' clutch handbags sitting around doing nothing so I decided to embellish them after I taught myself how to stitch these roses onto t hings. Old stuff gets a facelift!
I started out with vintage cotton rag strips that I tea dyed. Then I used some kind of sheer material in my scrap box that was harder to work with because it was slippery; but once I figured out the trick of it it was a snap. I even figured out how to make little leaves.
To the cotton roses I added beads from a broken vintage necklace, pearl buttons, and other little findings.
1. Black velvet clutch
2. White beaded clutch
3. Crochet envelope clutch
4. Black jersey clutch
Friday, February 15, 2013
Tuesday, February 5, 2013
Chalk Paint: My First Try
So anyone who reads DIY blogs or decorating blogs knows that chalk paint is a huge big deal right now. I love the look of chalk painted furniture, and have always wanted to try it. But at around $40 for a quart, I was reluctant to shell out for it! So I just used flat paint watered down for the same effect with some nice results. Still, I really wanted to try the real deal.
Then one day I ran across a "fake" chalk paint recipe on line somewhere, involving plaster of Paris. I still stalled, because plaster of Paris is just not something I think about buying at the home improvement store.
Then, I read somewhere about making a fake chalk paint with baking soda.... now that, I can handle!
So, I needed a furniture candidate to be my guinea pig, in case I royally messed up.
I found just such a piece at the local recycling center, in the dump. Yes, the dump.... the legs were wobbly and needed tightening, and the drawer missing, but someone just gave up on it and dumped it instead. That's okay. I rescued it in a flash.
The main thing I like about this piece is it is solid. Like I always say, it's not worth putting pretty paint on crappy furniture. This thing weighs about 25 Lbs. I kid you not. Once we tightened up the screws on the leg brackets, it was solid as a rock. The other thing I like about it is that it was FREE!
One of the things they say about chalk paint is you don't have to sand or prep the item you're painting. But I did lightly go over the surface with 60 grit sandpaper and my electric sander.
I used some leftover paint from another project and poured about 2/3 cup of paint in a plastic container with a lid, and added 1/3 cup baking soda, and 1/4 cup water and stirred it up. It still didn't look right so I added the rest of the paint in the can (about another 1/2 cup or so) and more water, until I had a mixture that resembled the consistency of pancake batter. Then I slathered the paint on.
It was gritty, and dried quickly so I had to work fast. I learned several things pretty quick:
1. Don't try to "touch up" a spot that already has paint on it. Trying to add more paint over a spot you just painted a minute ago takes almost all of it off as you go, leaving "gaps" in your painted surface. That was tricky to deal with.
2. A little primer is a good idea. A few small stains did leak through.
3. You're probably going to have to do 2 coats; I did. There were too many bare spots on my piece after one coat. You can kind of see this in one of the pics above, where I show the brush streaks in the first coat. All of that got covered in the second coat. But let it thoroughly dry first! I guess that depending on your piece, you could do one thick coat, but I hate thickly coating a piece with paint because of drips. Ugh.
4. Work fast with chalk paint. Fast, fast.
After I got it all painted, and dried, It felt gritty and rough. So I sanded it a bit with some 150 grit sandpaper, by hand. Then I distressed it. I discovered that this stuff really bonds well! It was a pain in the neck to get down to the original finish in my distressed spots! I had to apply a lot more pressure than usual. So, this paint isn't going anywhere. Which is good.
(The drawer is missing from the table, but I am going to cover the hole with a false drawer front and pretty knob.... eventually. For the time being, I am just going to turn it around so you can't see it.)
Next, I decided to try glaze. I have never glazed anything before but have been dying to try it. So off I went to the home improvement store and I bought a Rustoleum product that looked good, and some furniture wax to go with it. The glaze ran me about $15, but a little goes a loooooooong way so I will be able to use this on many, many more pieces. So, it is totally worth the money if you do a lot of projects. The paste wax was $10, and again: a little will go a long way so - it's worth it.
The glaze goes on with a brush and is then wiped off. It left my previously bright white piece with a nice tea dyed look.
When the glaze had dried overnight, I waxed the table by applying with a soft rag, drying 15 minutes, and buffed it with a dry, clean rag. It turned out great. I am very, very happy with the result. I am thinking about keeping this and using it in my den.
The wax really smoothed out the gritty texture, without a high gloss look (I do not like high gloss.)
I am really happy with the performance of the fake, baking soda "chalk" paint result!
I am thrilled with the glaze (although I did decide not to use this on my buffet project, as it turned out darker than I thought, and darker than indicated on the can. But I think that was because of the way it reacted to the chalk paint. It absorbed more and therefore, darkened more.)
I am thrilled with the furniture wax finish. No stinky shellac fumes!
I am altogether pleased with the entire result. :)
Obviously, because I have never used Annie Sloan Chalk Paint, I do not know how the baking soda recipe compares to the real thing. But still plan on one day giving Annie Sloan a whirl. :)
Tuesday, January 29, 2013
Old Barn Treasure
We have several old barns on our property, and over the years they have provided me with many junk discoveries. It seems like each layer of stuff we remove reveals more and more buried - literally - "junk treasure".
And when others see "junk", I see beauty. And art.
Like these old doors. The screen door makes my heart go pitter patter!! I plan on ripping out the screen and putting chicken wire on it, and adding hooks and things for a back drop/display piece for my booth when I get to go on the road with my stuff; or in a shop, etc. Heck, I could even use it in the house. :)
Then there are other two doors in the same pile; both really narrow. I suspect they're a double door unit for a wide doorway. I've been making plans with the handy Hubbs to make a corner cabinet/shelf with them. They're perfectly chippy and shabby, I probably won't do a thing to them except clean them and poly them to hold the paint down. And the old door handles! Love those.
I am a hopeless junk addict. What kind of crazy person gets this excited about junk?! Yeah, me.
Ha.
Wednesday, January 23, 2013
1950s Sweaters (New Year New Inventory Part 2)
These vintage sweaters are from the 50s. They were part of the owner's wardrobe for college in the 50s. I photographed them (yep, cruddy pics in cruddy light) with a 40s-50s style plaid skirt that is actually an 80s model. :)
1. 40s-50s style 1980s plaid skirt
2. Ivory cashmere sweater
3. Monogrammed sweater
4.
Tuesday, January 22, 2013
New Year, New Inventory
I have a whole lot of new inventory I am slowly starting to add to the shop. Purchased locally and also on trips to Virginia Beach. I was so busy with banner sales over the holidays I really neglected my vintage inventory updating. I have even more new items, for later. :)
1.
4. 50s red wool suit coat with big wooden buttons
5. 70s wool camp style shirt with belt, like new condition! I love this thing, but it's too short on me.
6. 60s black punps with cool fan "thingy" on the toes
I know the posts around here have been lacking in the interest department lately, for many reasons.
1. My sister is getting married, in about 5 weeks. It's a DIY wedding, and she, my mom and myself are up to our necks in DIYing. It's going to be a fabulous wedding. Burlap, lace, old jars, candy buffet, Mumford and sons soundtrack, crinoline lifted bridesmaids dresses, pie and cake buffet, candle light..... yeah. A little bit of every kind of indie, rustic, outside-the-box awesomeness.
2. One of my projects for the wedding is re finishing a huge old 1920s buffet for one of the props at the reception. So after my little holiday break following my staircase, I am once again spending a lot of time sanding, and sanding, and sanding, and scraping, and sanding.... and steaming off the layers of damaged veneer, and sanding..... this time I have an electric sander, though. Next is cleaning it, priming, painting, painting again, distressing, glazing, and finally waxing/or applying the poly stuff. My issue is, having to do all of this indoors, in my (large) office room. I hope the weather cooperates with me a few days so I can do the painting, glazing and poly outdoors! Otherwise I don't know what I'm going to do. I can't very well do it in the house with the windows shut on cold winter days. :/ Here is a pic of the buffet:
3. Wedding season must be getting in gear early this year, as I have been as busy as all get out with custom banners - mostly wedding, valentine, and baby shower banners. But that's ok! Bring on the custom orders! :)
4. I am also helping my friend with the antiques shop, again. She closed it in October after the last manager she had kind of didn't work out. So, we're putting the things on line and having people come in by appointment to shop. Looks like I have been officially hired to manage the store, again, now that my hectic job ended and has freed me up for doing more things like that. If you're in NC and want to make an appt. to see the shop, please let me know! We want to clean out the inventory, and things are going for dealios. We're probably going to officially re open the shop in the early spring. After I get through this wedding and recover from all of that.
I am dreaming of April and gardening... peonies, iris, lilac, zinnias.... red juicy tomatoes warm from the sun...meanwhile, it's somewhere in the low 20s outside, with a windchill in the teens, and I am bundled up in sweaters with the wood stove keeping me toasty, and Netflix to amuse me when I am not making banners or listing vintage.
I have also been enjoying Downton Abbey Season 3!! Has anyone else?
Stay warm, dears! :)
Sunday, January 20, 2013
Candleabra Jewelry Display
I found this pair of vintage metal wall light fixtures in a barn when I moved in here. They were actually wired up for light bulbs, but it had been done in the 50s and was old and too dangerous to plug in, so I ripped it all off and painted them.
I hung them on either side of my 1920s vanity mirror for hanging things on. Works great!
(The one on the other side has hats on it.)
I hung them on either side of my 1920s vanity mirror for hanging things on. Works great!
(The one on the other side has hats on it.)
Monday, January 7, 2013
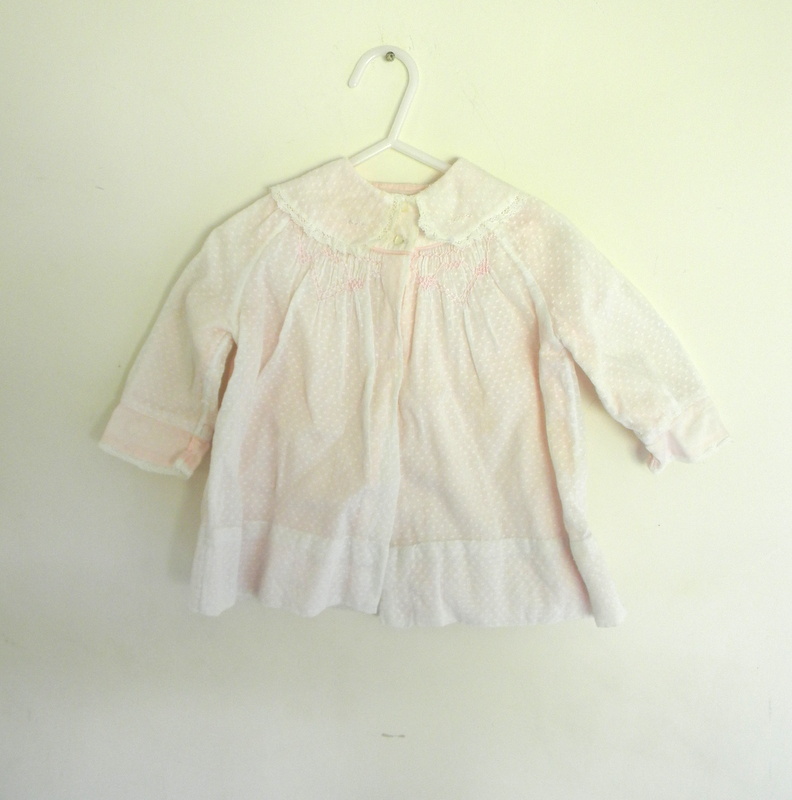
Shop Update: Julia's Child!
I've neglected talking up my vintage kid's shop. Well, my mom and I's vintage kids shop! My mom helps me with picking and buying inventory for this shop. Last spring she scored a huge box of vintage 1950s boys clothing and it sold like hotcakes. :) Since then we just pick thrift shops and, occasionally, Mom's personal attic stash!
"Baby" burlap bunting banner photo prop from my other shop. It fits here. HA HA!
White leather shoes with bells on the toes, 50s - SOLD
Embroidered leather belt, 60s - 70s. SOLD
Subscribe to:
Posts (Atom)